Making of "Inside the Puppet's Soul".
A tutorial by Teodoru Badiu

Download the Source Files. Because the .psd files are to big for the Web I had to provide .jpg files for this tutorial.
The tutorial is about the making of my surreal work entitled Inside the Puppet's Soul. The idea was to give life and soul to a Puppet and to be able show a sadness feeling on her face using Photoshop and a few photographs. All the Photos used for the image in this Tutorial are shot by me with my Digital Nikon D70. The puppet is one of my puppets that I bought from the fleamarket and the child photo is a shot of my son, what remains are some textures from my texture collection and Photoshop work. This Tutorial was made on a PC, with Photoshop 7 but it can be also done with CS , Cs2 or Photoshop 6. If you are on a Mac use Cmd instead of Ctrl and Opt instead of Alt. For the shortcuts.
Step 1
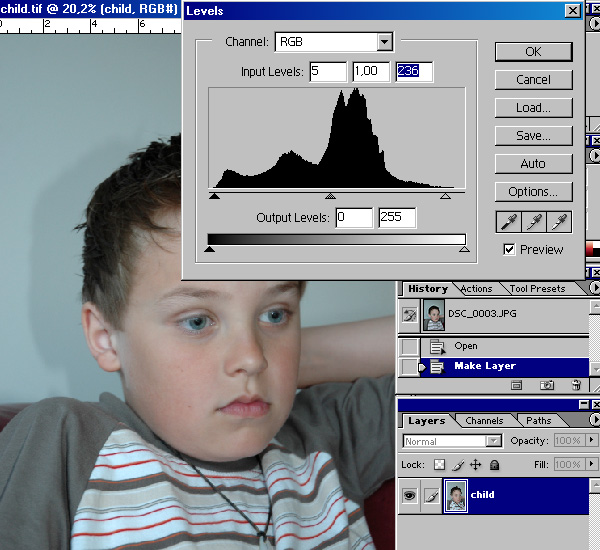
Open the Puppet.tif and the Child.tif files from he Source folder on the Cd. Select the Puppet file and doubleclick on the background layer icon to float the layer off background and then name it puppet. It is a good habit to name the layers, it helps to keep a clear view if the work has a great amount of layers and if you will need to came back to a job at a later date, for changes or additions. Change now to the Child file and make some Input Level adjustments to affect all channels, for that drag the highlight slider to the right a little and the shadow slider to the left a little.
After that go to Filters-Sharpen-Unsharp mask and use this values: Amount 100%, Radius 0,5%, Threshold 0%. Save your progress now.
Image 01
Step 2
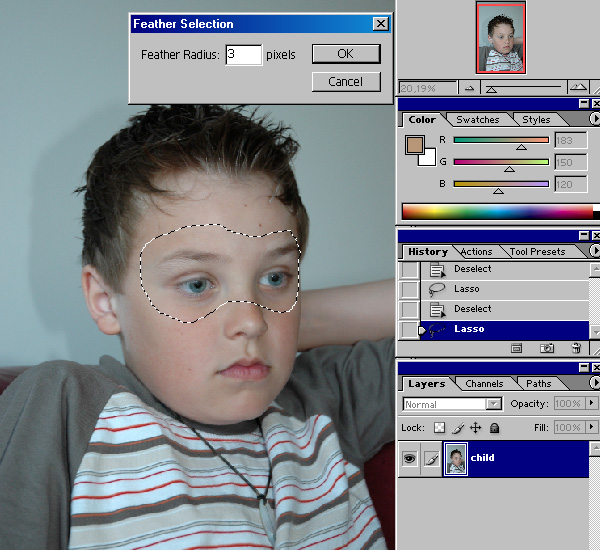
Now use the Lasso tool (L) and draw a rough selection around the eyes, go Select-Feather (Alt+Ctrl+D) and use a 3 pixel Feather radius.
Image 02
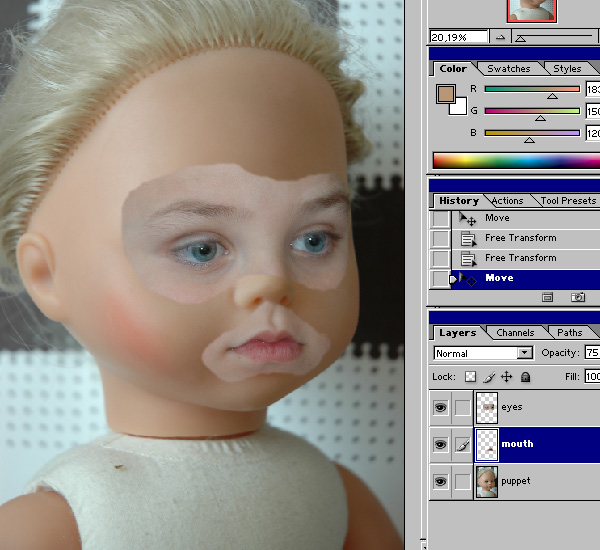
Edit-Copy(Ctrl+C) and Edit-Paste(Ctrl+V) the eyes into the Puppet file. Now using the Lasso (L) toll draw a new selection around the mouth of the child and copy(Ctrl+C) paste(Ctrl+V) this into the Puppet file, name the new layers mouth and eyes, then save and close the child file. Back to the Puppet file, select the eyes layer and turn down the opacity to about 85% in order to have a look through the layer then use the Free Transform tool (Ctrl+T) by to scale the eyes at the size that is required to make them fit with the puppet's eyes, once you are happy with the result do the same thing with the mouth, and when you are done you should have something like in the image03.tif
Image 03
Step 3
Now set the mouth and eyes Opacity back to 100% and with the eyes layer selected go to
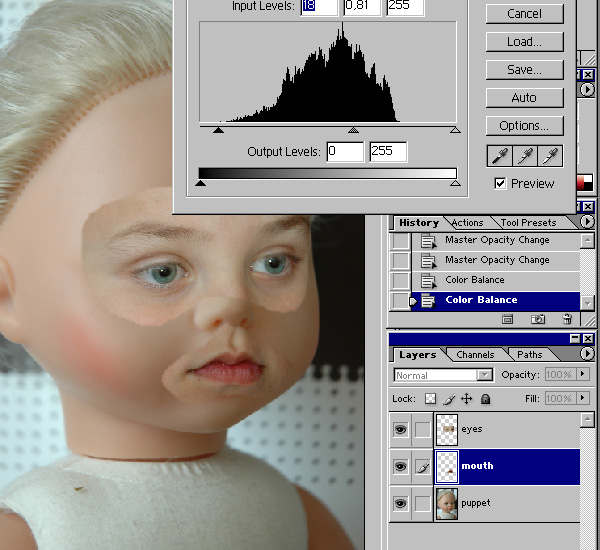
Image-Adjustments-Color Balance, be sure the Preview check box is selected as well as the Preserve Luminosity one and use this Values: Midtones, Cyan +9; Magenta-3; Yellow-22.
Shadows, Red+2;Green+2;Blue+2. Highlights,Red+3;Green+1;Yellow-3. Repeat this steps for the mouth. Next with the mouth layer selected go to Image-Adjustment-Levels and drag the shadow slider to the right a little like in the image04.tif.
Image 04
After that go to Image -Adjustments-Hue/Saturation(Ctrl+U) and drag the Saturation slider for the Master to -10 and for the Reds to +10. Now for the eyes layer just go to Image -Adjustments-Hue/Saturation(Ctrl+U) and drag the Saturation slider for the Master to -5.
Step 4
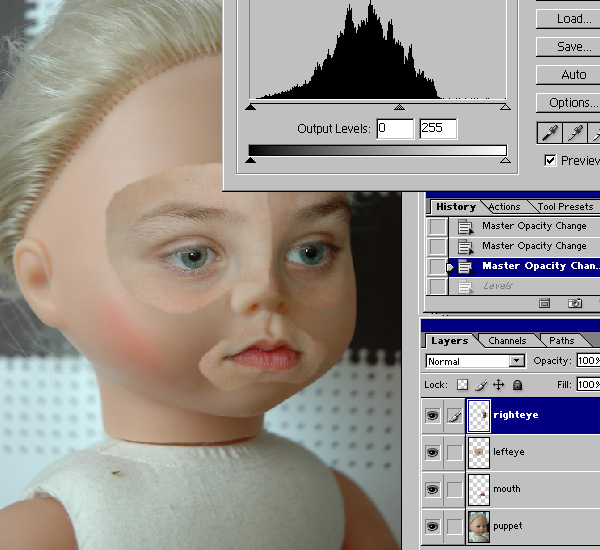
Select the eyes layer and use the Lasso tool (L) to draw a rough selection around the left eye, go Select-Feather (Alt+Ctrl+D) and use a 3 pixel Feather radius, now Edit-Copy (Ctrl+C)
Then hit the Return key to Delete the selection and Edit-Paste (Ctrl+V). Rename the Layers lefteye and righteye. At this time reduce the Layer opacity again and use the Free Transform toll to resize and to place the eyes and the mouth in the right position. Then select the lefteye layer and go Image-Adjust-Levels (Ctrl+L) and drag the midtones slider a little to the right like in the image 05.tif
Image 05
Step 5
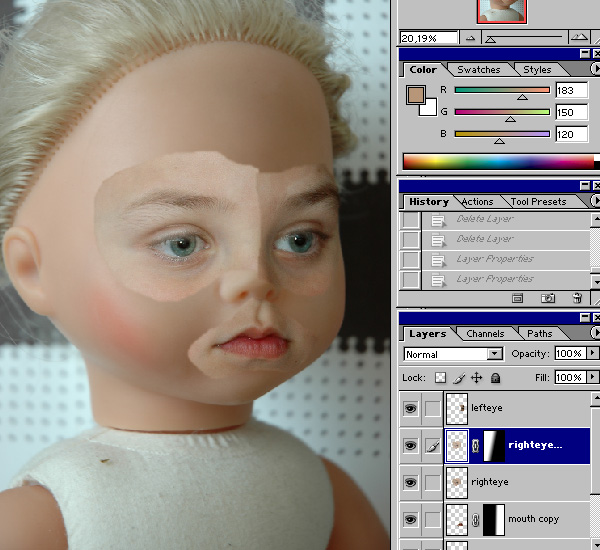
Select the mouth layer and drag it on the Create new layer icon to make a copy then go Image-Adjust-Levels (Ctrl+L) and drag the midtones slider a little to the right. With the mouth copy layer active click on the Add layer mask icon on the bottom of the Layer pallette,
Select the Gradient tool(G) and a Black,White linear gradient then click and drag from the left of the mouth to the middle. Now select the right eye and then go Image-Adjust-Levels (Ctrl+L) and drag the midtones slider a little to the left, then click on the Add layer mask icon on the bottom of the Layer pallette to make a righteyecopy layer.
Select the Gradient tool(G) and a White, Black linear gradient then click and drag from the left of the eye to the nose.You must have a image like this now.
Image 06
Step 6
Add a layer mask to the mouth, lefteye and righteye layer. Click on the mouth layer to select it and select the Brush tool (B). Select a soft-edge brush of about 100 pixels with an opacity of about 70%. Paint on the mask to cover the hard edges and the parts of the mouth that are not desired. Zoom in as much as you need and change you brush size and the opacity as you need to get the best results. When your done use the Blur tool with a soft round Brush of about 45 pixels and the Opacity set to 50% to Blur slightly the edges where the mouth meets the puppet face. The result should look like this
Image 07
Repeat this steps for the left and the right eye layers, until you are pleased with the result.
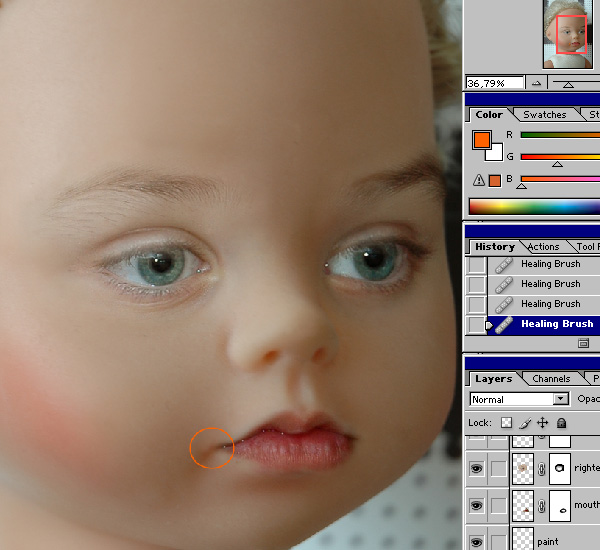
It is important not to forget to work with the Brush Opacity settings here and to work with attention on the eye brows. Start with a high Opacity setting about 95 on the edges and go down with the Opacity when you work on the eye edges and the eye brows. Now add a new Layer over the Puppet layer and name it paint. Select a soft-edge brush of about 100 pixels with an opacity of about 70%. Select the Eyedropper tool (I) and click on the corner of the mouth to select color now paint carefully on the new layer in order to cover the mouth corner that looks out underneath the mouth layer. At this time we have to do all the Retouch work .
Use the Healing Brush toll (J) to to replace the dirt on the nose, on the face, on forehead and the impurities on the body. Then go to Filters-Blur and add Blur to all three layers.
Don't forget to save your progress. Now you should have a image like this.
Image 08
Step 7
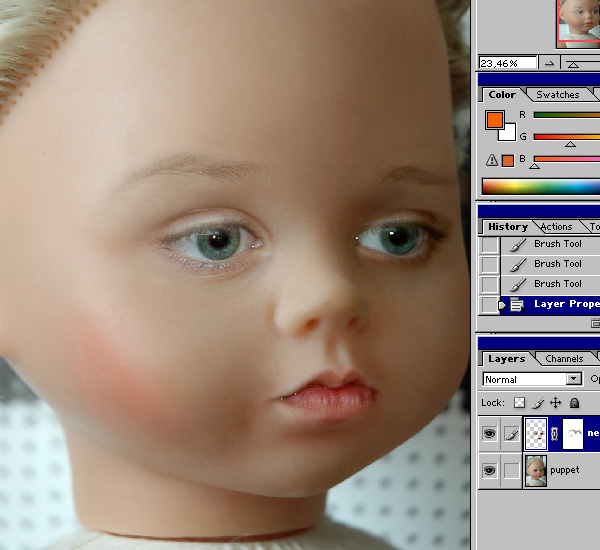
Select the Upper layer then link all four layers, go to Layer-Merge Linked (Ctrl+E), name the new layer newface and turn the visibility off by clicking on the eye icon on the Layer palette. Again using the Healing Brush toll (J) replace the eyebrows of the puppet on the puppet layer. Now turn back the newface layer visibility and add again a new Layer mask.
Select a a soft-edge brush of about 100 pixels, with an opacity of about 70%, zoom in
and rework the edges of the newface layer like we did before, then use the Burn tool (O)
with a soft-round brush and the Opacity set to 5% to add a bit more shadow on the left eye,
and on the left side of the lips. Now I have to work a bit on the face expression. I want it to look a bit sad not the way it is right now. To do that I select the Rectangular Marquee Tool (M) and draw a rectangular selection around the mouth then go Edit-Free Transform a scale a the mouth a bit down from the right to the left, be careful to not scale to much, then do the same from left to right. Now I draw a rectangle selection around the right eye and scale down a bit by dragging from down to up. After that I select the Lasso tool (L) and draw a selection around the right eyebrow go Select-Feather (Alt+Ctrl+D) and Feather the selection with a 3pixel radius, then select the Free Transform tool and move the eye brow down a bit and rotate it a little to the right. Now go to File Save as .. and save your file under a new name, do not overwrite your previous one !!
Image 09
Step 8
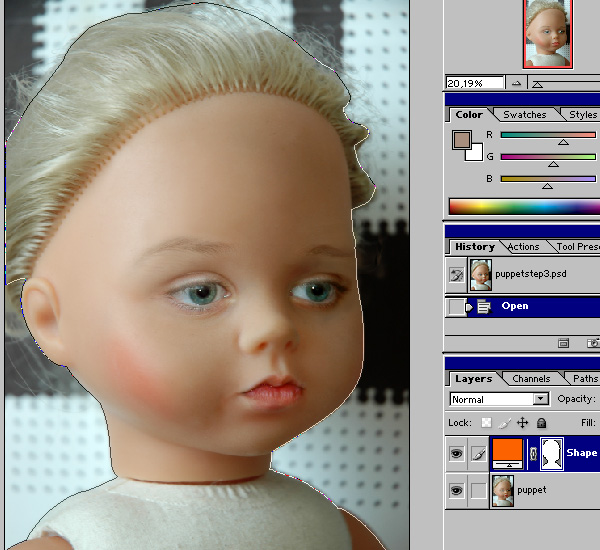
Go Layers-Flatten Image, and go Image-Adjustments-Color Balance be sure the Preview check box is selected as well as the Preserve Luminosity one and use this Values: Midtones, Red -11; Magenta 0; Yellow -11. Double-click the background layer icon to float the layer off background and name it puppet then make a copy. With the puppet copy layer active go to Filter-Blur-Gaussian Blur and blur with a 1pixel radius. Reduce the puppet copy layer opacity to 50% and Set the blending mode to Soft Light. Flatten Image again. Now use the Pen tool
(P) and draw a closed path around the puppet, zoom in to see better where your part lies, be sure the have it on the inside part of the puppet and background edge, and set the layer Opacity to 0% for a better view. To create a curve path click+hold left mouse key+drag.
Image 10
Step 9
Select the path and Ctrl+click on first icon in the Path palette to Load path as a selection, go back in the Layer palette and choose Select - Feather (Alt+Ctrl+D) and Feather the selection with a 1 pixel radius, now change to Channels Palette and click on the Save selection as channel icon to make a new Alpha channel. Now go back to Layer Palette select the puppet layer and choose Edit-Copy (Ctrl+C). Save and close the file under a new name.
Now go to File-NewFile and set Width to 2400px, Height to3600px, Resolution 300pixels/inch and RGB Color Mode and Edit-Paste (Ctrl+V) then rename the layer puppet.
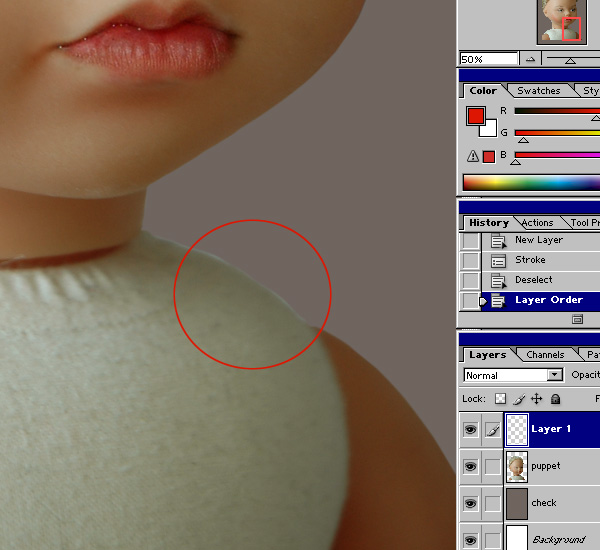
Create a new layer above the Background layer and Fill it with a grey color tone and name it check. Now zoom in and check the edge of the puppet, using a soft small round Brush and the Erase toll (E) get rid of the withe background color that maybe still remain after the cutout that delete the check layer.
Image 11
Step 10
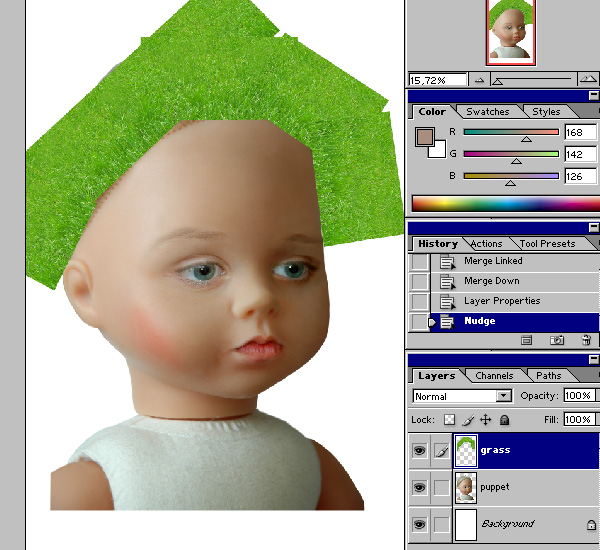
Open the grass.psd file from the Source folder on the Cd and click - drag it into the puppet file then close the grass.psd file. Name the layer grass and drag it above the puppet layer.
Now made some grass layer copys (Ctrl+J) and using the Free Transform (Ctrl+T) tool and the Rectangular Marquee Tool (M) cut and arrange them like in the image 12.
Image 12
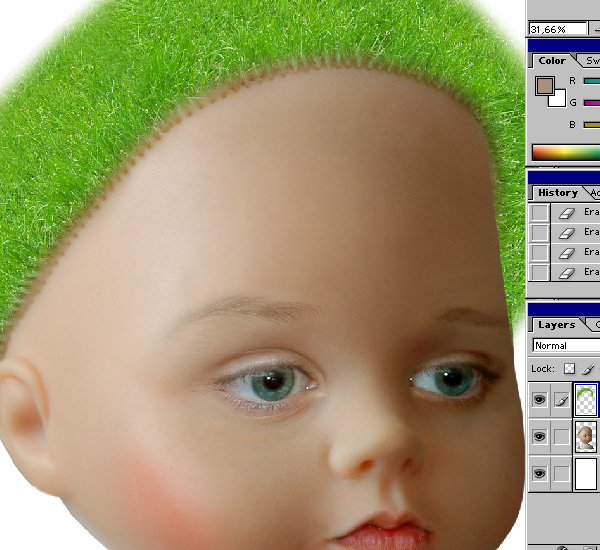
After that Select the Eraser Toll (E)
And a big soft-round brush and erase the gras and the hair of the puppet until you have a look like the one in the image 13. For the hair edge where the grass mets the puppet hair carefully erase with the Eraser Tool Opacity set down to about 50%
Image 13
Step 11
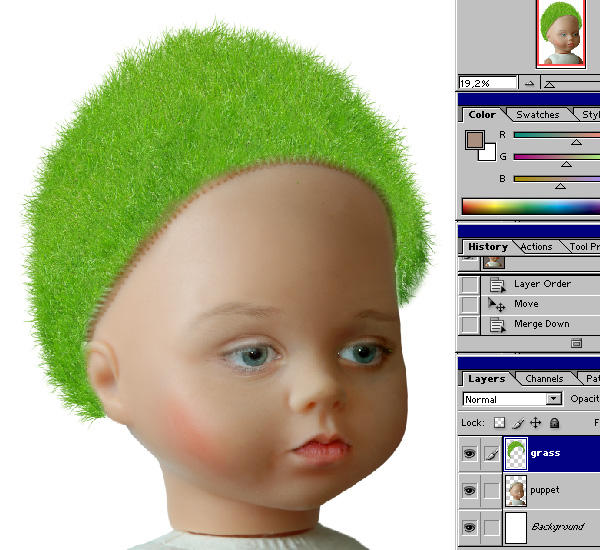
Select the Clone Stamp Tool (S) and the Gras Brush, Set the Master diameter of the Gras Brush to about 160px and then by holding Alt key down click on the grass layer, release the Alt key and paint around to clone the grass hair. To get the best result from that technique you have to use different Brush sizes and opacity and also change the Brush between Gras and Dune Gras. You should also rotate the grass layer because you can work better on the sides, work on the gras layer until you have create a shape like in the image14.
Image 14
Now duplicate the grass layer and drag the copy under the puppet layer, select the Free Transform Tool (Ctrl+T) and scale the grass copy layer a little to cover the parts behind the
Puppet that are not covered by the grass layer. Select the Erase Toll (E) again and use a small
Soft-round brush to clean up the part of the grass layer that cover the puppet's ear.
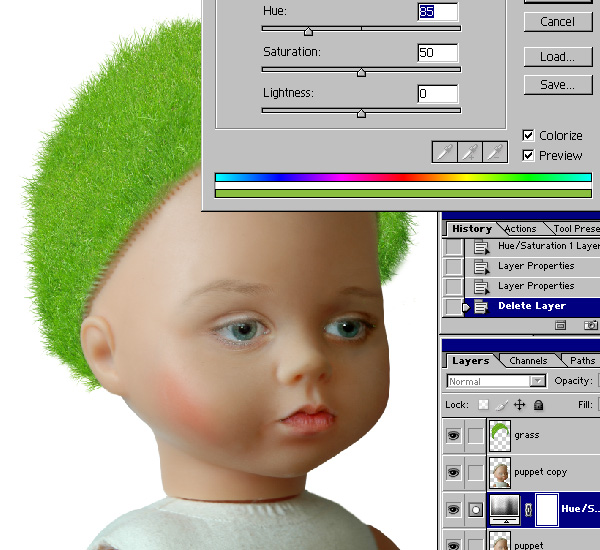
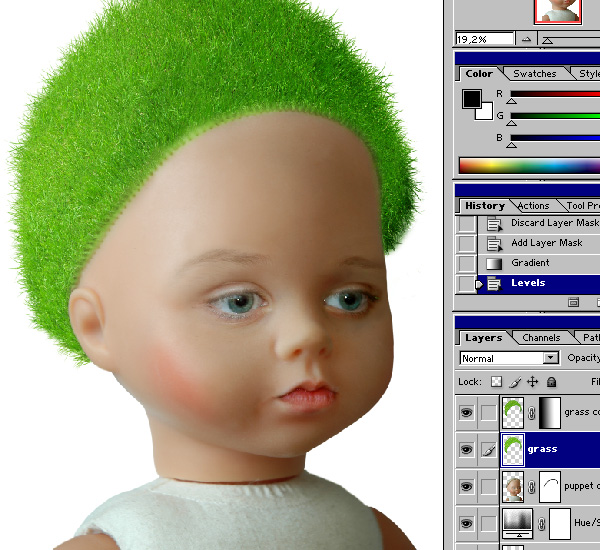
Now drag the puppet layer on the Create new layer icon to make a copy, and select the puppet layer then go to Select-Load Selection, Select-Modify - Contract and Contract by 5pixels then hit return to delete. Now click on the Create new Fill or Adjustment Layer at the bottom of the Layer Palette and choose Hue/Saturation, turn on the Colorize option in the check box, drag the Saturation slider to the right until you reach 50 and the Hue until 85.
Image 15
Step 12
Select the puppet copy layer and click on Add layer mask icon at the bottom of the Layer palette. Hit the X key and select the Brush tool (B) and a soft-round brush of 100 px and the Opacity of 50%. Click on the Layer mask thumbnail in the puppet copy layer and then carefully pain the part of the head where the hair grows and meets the grass, if you have painted to much change the color from black to white and paint again.
When you are done select the grass copy layer and make a new copy and Set the blending mode of the layer to Multiply and then Add a layer mask, select the Gradient tool (G) and a Black to White linear gradient then click and drag from the left to the middle of the new grass layer to mask out the left side of the grass. Save your progress now under a new name and now you must have a image that looks like the image16.
Image 16
Step 13
Now link all the layers above the background layer and the go Layer-Merge Linked (Ctrl+E),
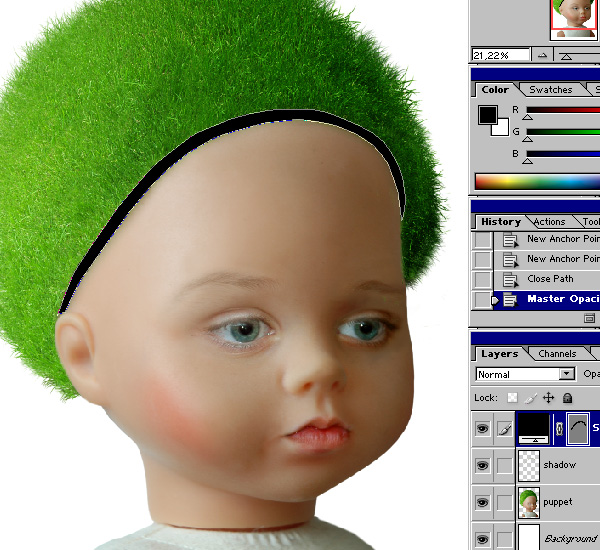
I could group the linked layers and make a new folder but because I have saved the progress under different file names i choose the destructive way and merge them down. Select the Pen Tool (P) and draw a selection at the base of the hair like in the image 17.
Image 17
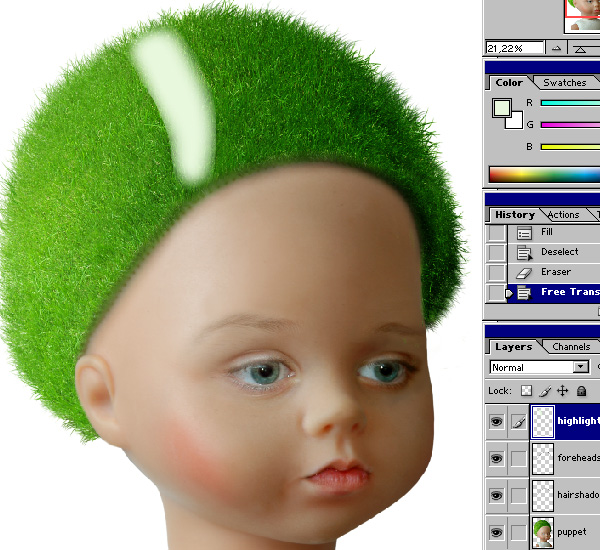
Go Layer-Rasterize-Shape then go Filter-Blur-Gausian Blur and Blur with a 13 pixel Radius and Set blending mode for the layer to Hard light and the Opacity to 50%. Now make a copy of the shadow layer and name it forehead shadow and Set blending mode for the layer to Soft light then use the Arrow keys to Nudge it down and to the right. Create a new layer and name it highlight, Select the lasso tool and draw a selection on the hair then fill it with a # E8F8DD green color like in the image18. Now go Filter-Blur-Gaussian Blur and Blur with 50 pixel Radius and Set blending mode for the layer to Soft Light and the Opacity to 75%.
Save your progress.
Image 18
Step 14
Again link all the layers above the background layer and the go Layer-Merge Linked (Ctrl+E). Go Edit-Free Transform (Ctrl+T) and scale it down a bit by holding the Shift key pressed. Use the Burn Tool (O) to softly darken the bottom part of the hair under the ear and use the Smudge Tool (R) to create the part of the arm that is missing.
Image 19
Open the wood.tif file from the Source folder on the Cd and click -drag it into the puppet file then close the wood file, name the layer wood. Use the Free Transform tool to scale the wood layer until it covers the background. Repeat the steps with the metal.tif file. Select the metal
Layer and Set the blending mode to Hard light. Select the wood layer and make a copy the set the Blending mode for the wood copy layer to Multiply and Add a layer mask., select the Gradient tool (G) and a Black,White linear gradient then click and drag from the left to the middle.
Image 20
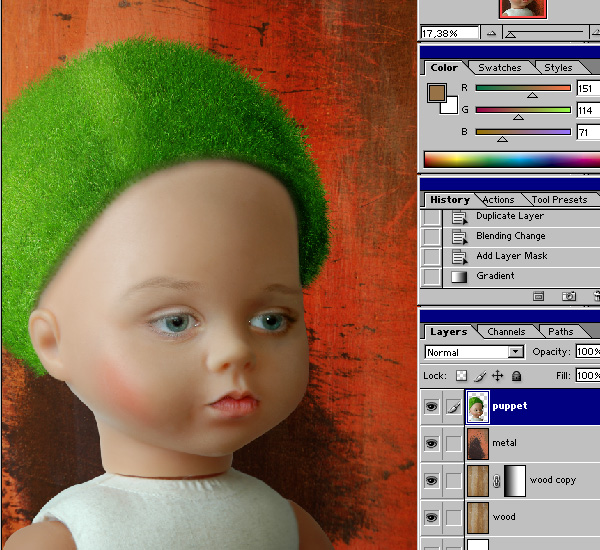
Step 15
Select the puppet layer and go Select-Load Selection, now create a new layer under the puppet layer name it shadow and fill the Selection with a brown color # 977247. Go to Filter-Blur-Gaussian Blur and blur with a 20px Radius. Now move the shadow right-down and set the layer blending mode to Multiply. Select the puppet layer again and click on the Create new fill or adjustment layer icon at the bottom and from the pop up window choose color balance. Use the following settings: Midtones, Yellow -15; Red +2; Shadows, Blue +10;
Cyan -2; Highlights, Blue +10;.
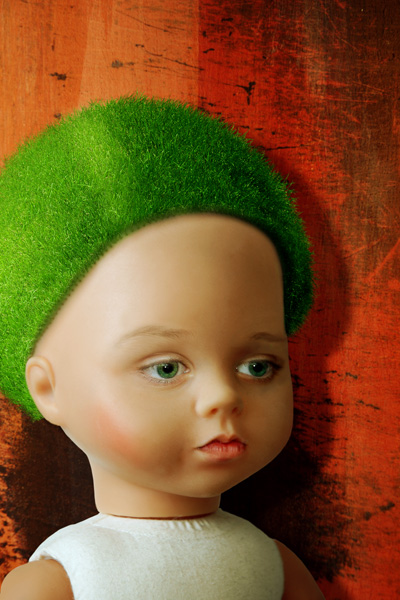
Inside the Puppet's Soul
Step 16
Select the Blur Tool (R) and a soft-round brush and set the strength for the Stroke to 25%
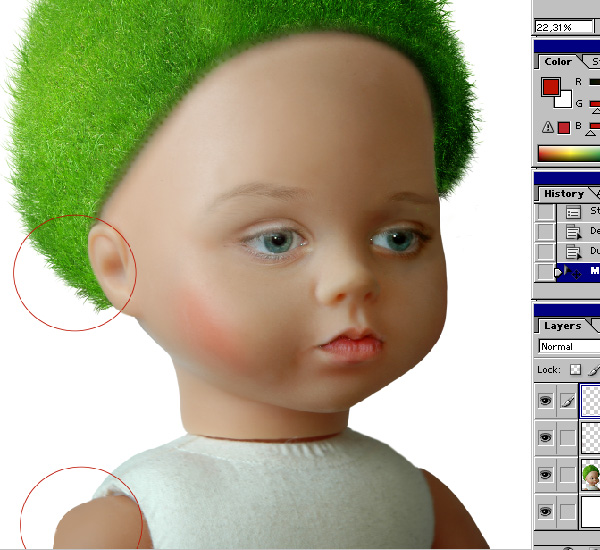
And blurs softly the edge of the gras hair and the bottom part of the puppet. Also Gaussian blur the metal and the wood layer with a Radius of 1,5-2px. Zoom once again in at 100% and check the edges all around the puppet to see if everything is fine, if there is need for some correction just do it, if not that is it.
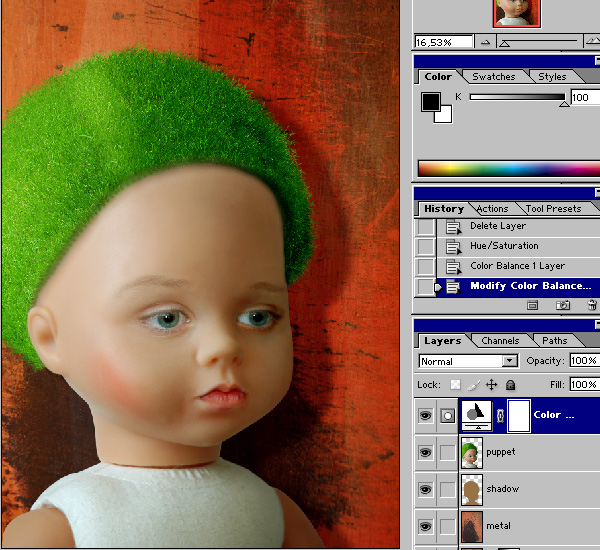
Now at the end click on the Color Balance layer then on the create new fill or adjustment layer and from the pop up window choose Hue/Saturation. Check the colorize box and set the Saturation to 38 and Hue to 40 then click OK. Now set the blending mode for the layer to soft light and the Opacity to 70%. Can you see the difference. This boost the colors and make the image to get a overall warmth and brings the different images from different photos together. This is the look and the feeling I wanted to achieve and so the work is done. Now save your file under a new name as .psd and as .tif file as well. We are done.
Image 22
Copyright © 2011 Teodoru Badiu & Apocryph.net. All rights reserved.